DevInsights is a platform for developers to explore the latest trends, tools, and techniques in web development. From beginner-friendly tutorials to in-depth technology reviews, we provide actionable insights to help you level up your coding skills.
Reading Count:
419
Building Scalable Web Applications with Next.js
Next.js is a powerful React framework that enables developers to build server-side rendered (SSR) and static web applications with ease. Developed by Vercel, Next.js simplifies the process of creating fast, scalable, and SEO-friendly web applications. Whether you're building a small project or a large-scale application, Next.js provides the tools and features you need to succeed. In this guide, we’ll explore the key concepts of Next.js and walk you through building your first application.
Table of contents [Show]
What is Next.js?
Next.js is a React framework that adds server-side rendering, static site generation, and other powerful features to React applications. It provides a seamless development experience with features like file-based routing, API routes, and built-in CSS support. Next.js is widely used for building high-performance web applications that require SEO optimization and fast load times.
Key Features of Next.js
- Server-Side Rendering (SSR): Improves performance and SEO by rendering pages on the server.
- Static Site Generation (SSG): Generates static HTML at build time for faster page loads.
- File-Based Routing: Automatically routes files in the
pagesdirectory to URLs. - API Routes: Allows you to create backend endpoints within your Next.js application.
- Built-In CSS Support: Supports CSS modules, Sass, and styled-jsx out of the box.
Setting Up a Next.js Project
To get started with Next.js, you’ll need Node.js and npm installed on your machine. Follow these steps to create a new Next.js project:
- Create a new Next.js project using the following command:
npx create-next-app my-nextjs-app
- Navigate to the project directory and start the development server:
cd my-nextjs-app
npm run dev
Open your browser and visit http://localhost:3000 to see your Next.js app in action.
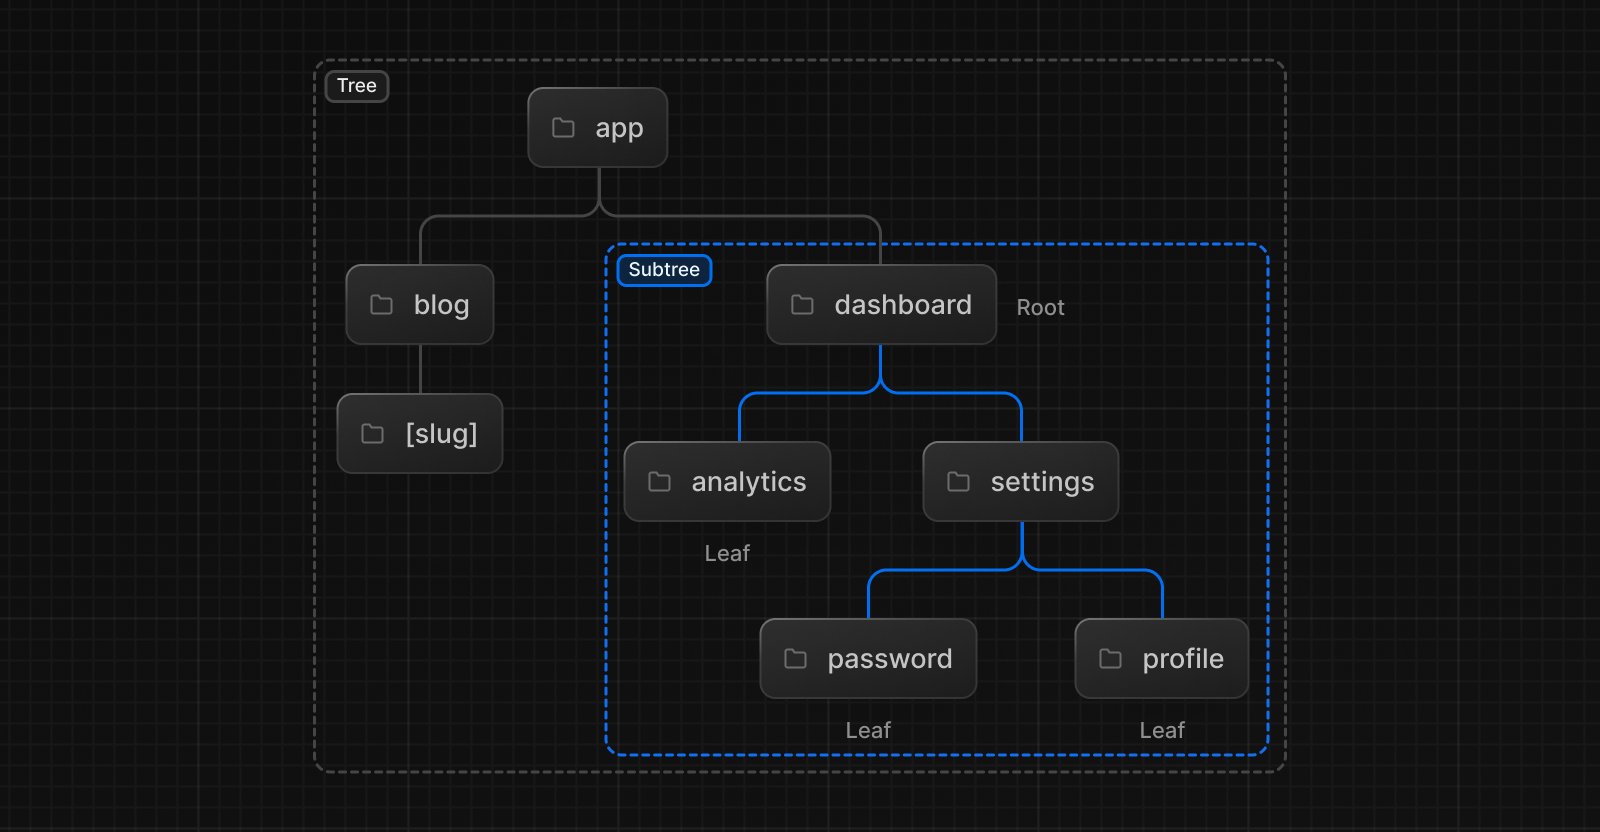
File-Based Routing in Next.js
Next.js uses a file-based routing system, where each file in the pages directory corresponds to a route in your application. For example, create a new file named about.js in the pages directory:
// pages/about.js
export default function About() {
  return (
    <div>
      <h1>About Us</h1>
      <p>Learn more about our company and mission.</p>
    </div>
  );
}
Now, visit http://localhost:3000/about to see the About page.
API Routes in Next.js
Next.js allows you to create backend API routes within your application. Create a new file named hello.js in the pages/api directory:
// pages/api/hello.js
export default function handler(req, res) {
  res.status(200).json({ message: 'Hello, Next.js!' });
}
Now, visit http://localhost:3000/api/hello to see the API response.
Static Site Generation (SSG) with Next.js
Next.js supports static site generation, which allows you to generate static HTML at build time. To create a statically generated page, use the getStaticProps function:
// pages/posts.js
export async function getStaticProps() {
  const res = await fetch('https://jsonplaceholder.typicode.com/posts');
  const posts = await res.json();

  return {
    props: {
      posts,
    },
  };
}

export default function Posts({ posts }) {
  return (
    <div>
      <h1>Posts</h1>
      <ul>
        {posts.map((post) => (
          <li key={post.id}>{post.title}</li>
        ))}
      </ul>
    </div>
  );
}
This page will fetch data at build time and generate static HTML for each post.
Conclusion
Next.js is a versatile and powerful framework for building modern web applications. Its support for server-side rendering, static site generation, and file-based routing makes it an excellent choice for developers. By following this guide, you’ve learned the basics of Next.js, including setting up a project, creating routes, and using API routes and SSG. Start building your next project with Next.js today!
Suggested Image Title: "Next.js File-Based Routing Diagram"
Recent Posts


Share